What Are Solar Pool Heaters and How Do They Work?
Solar pool heaters work by using solar panels made of black polypropylene or rubber tubes that are connected together to create a large surface area. These panels absorb the sun’s heat and transfer it to the water that flows through the tubes, naturally heating the pool. The process is incredibly eco-friendly, as it uses zero emissions and has zero operational costs. With a do-it-yourself installation, these heaters provide an efficient way to heat your pool by 10–20°F, saving both energy and money.
These systems come in various shapes and sizes, but they all rely on the same basic mechanics. Your existing pump circulates the water through black tubing, which absorbs the sun’s heat. The more surface area the system has, the more BTUs of heat it can generate, making it possible to heat a greater volume of water. However, since pools are open to the air, heat can be lost quickly, so it’s recommended to over-size the system to ensure enough heat is retained.
Panels can be joined to increase the surface area, and they can be installed for above ground or in-ground pools, positioned in a variety of ways. You can control the system either manually by turning a valve or automatically using a solar controller. This makes solar heaters an adaptable and efficient choice for maintaining your pool’s perfect temperature throughout the season.
Solar Pool Heater Panel Connections
When setting up solar pool heater panels, the connections can differ depending on the brand. Typically, kits with 2 or more panels include all the necessary plumbing and hardware to easily attach the panels. For example, Smart Pool panels feature 1.5” threaded female openings on both ends, allowing you to connect a 1.5” male thread, while Fafco panels have barbed ends that fit standard radiator hoses and stainless hose clamps. If you’re installing the panels on a rooftop, ensure you have enough fittings to make the transition over the eave of the roof, down to the ground, and secure the plumbing using pipe straps. For masonry walls, tap-con screws are ideal for attaching pipe clamps.
Once you have the basic setup, head to your local hardware store for the appropriate connector pieces for your PVC, flex, or above ground pump and filter hoses. The next step is connecting the line leading to the panels to a bypass valve positioned after your filter for proper water supply. You will then connect the bypass line and the solar heated water line to your return line using a tee fitting. Finally, turn on the pump, open the bypass valve, and start sending the water to the panels for heating.
Sizing a Solar Swimming Pool Heater
When sizing a solar swimming pool heating system, several factors must be considered. These include the pool size, the length of swimming season, and the regional temperatures. You’ll also need to factor in the desired pool temperature and the solar resource available at your location. The collector orientation and tilt are crucial, as well as the collector efficiency. If you’re in a cooler or cloudier area, you may need a larger collector area to match the pool surface area. In places like Florida, a 15-by-30-foot outdoor pool will typically require a collector that equals 100% of the pool’s square footage, whereas in northern California, a system sized at 60%-70% of the pool area is often sufficient for 6-8 months of use. A pool cover can help reduce the required collector size, as it helps maintain heat. You’ll also want to ensure you have the right pool pump. If you’re switching from a conventional pool heating system, you might need a larger pump or an additional, smaller pump to efficiently move water through the collectors.
Above Ground Solar Pool Heaters
For large, steel-sided above ground pools, you can use solar panels that are long, flat, and bendable, with sizes like 2’W x 20’L or 4’W x 20’L, requiring a good amount of space to install. These panels can be placed along the pool’s length, often on a small rack attached to the braces or kickers of oval pools. For round pools, you may need to get creative and place them flat on the ground, or mount them to a fence using a solar panel rack made from materials like angle iron, 2 x 4’s, PVC, or plywood.
To connect these solar panels, simply add a hose, fitting, and hose clamp to link the panels to the pool pump and filter. The panels are connected to the return line after the pump, and if you need to install them farther from the filter, a longer hose or pipe is necessary. If you’re linking multiple panels, be aware that some systems are split in the middle, so make sure the water flows from inlet to outlet, maintaining the correct water flow. This installation ensures that your pool benefits from the optimum heating temperature even on rainy days, thanks to an included bypass valve kit that helps to control the system.
Above Ground Pool Solar Panel Installation
Installing solar panels for your above ground pools is straightforward. The SunCoil Solar Dome and EcoSaver solar panels are both simple to install, allowing you to set them up in under an hour. Start by shutting off the pump, and plugging the skimmer and return line to stop water flow. Choose a location where the panel(s) will receive at least 6 hrs of sun daily. Ideally, position them in a southern-facing direction, unobscured by trees. While SunCoil heaters should not be roof mounted, the EcoSaver panels can be installed on a rooftop for added efficiency.
To ensure the best performance, Universal Solar pool panels can be placed flat on the ground, or you can build a small rack from wood to mount them at an angle for better sunlight absorption. When connecting the system, attach the return hose from the pump to the solar panel inlet to bring cold water into the solar heater. Then, connect the solar panel outlet to the pool wall to bring warm water back to the pool.
These panels are modular, allowing you to connect additional panels if necessary. You can even install them in a remote location. For maximum heat collection, position the panels at an angle between 35°–45° to the sun, securing them with straps or clips to a solar panel rack. It’s also recommended to use a by-pass system to control the flow rate or to redirect the water around the solar panels during cloudy or rainy days.
Inground Pool Solar Heaters
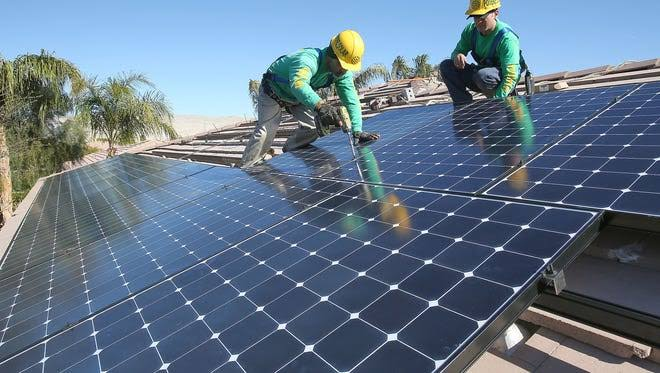
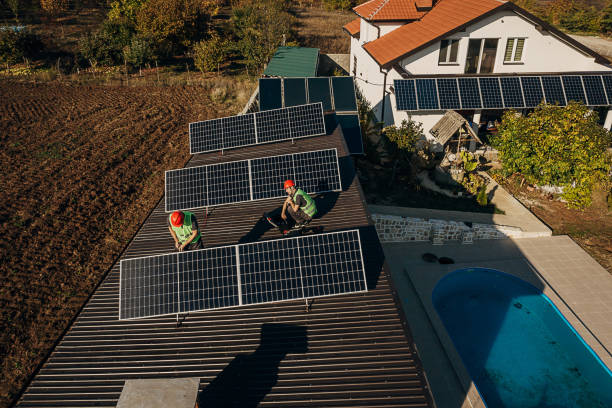
For inground pools, solar panel kits come in various sizes, such as 4’W X 10’L or 4’W X 20’L, and a good rule of thumb is to match panel square feet to roughly half the pool surface area. These panels can be mounted on a nearby roof, even as high as 2 stories, or you can choose spots like a garage roof, pool house roof, or the side of a hill. If you prefer, you can build an A-frame with treated lumber and plywood close to the pump and filter area for better setup.
The installation kits include roof mounting straps and other hardware, and the process is fairly simple. You’ll need a drill, caulk, and a helper to assist in holding the panels. First, mark where the straps will go, ensuring there’s space between them, and then drill through the plywood or roof, caulk the holes, and secure everything with lag bolts. Make sure the straps overlap each panel to secure them properly. Lastly, use connecting fittings and caps to link the panels, ensuring everything is tightly connected for the best performance.
Inground Pool Solar Panel Installation
Installing inground solar pool heaters requires more effort than the above-ground models because you’ll need to do some plumbing and connect multiple panels. Begin by unpacking the panels and setting them up on a rack in your yard, or even on the back of your fence. A patio gazebo can also be a good spot to mount your solar panels, providing a shady spot for relaxation and keeping them out of the way. When installing, ensure that fittings and check valves are added to prime the panels so water flow can easily be maintained without air traps. To secure the panels, use the hardware provided, including cross straps to hold them down in high winds.
Once the panels are securely mounted, glue a one-way check valve and 3-way diverter valve to the return pipe after the filter. These valves are included in the Solar Controller package. Next, connect the exit pipe from the opposite corner of the panels and run it parallel to the top of the panels, directing it towards the return line. To avoid water flowing in the wrong direction, add a check valve before connecting the exit pipe back into the return line. This ensures that the solar panel system works efficiently, maintaining optimum water flow.
Solar Pool Heater Automation – Set it, and Forget it!
To make your solar pool heater even more efficient, you can automate it by installing a wall mounted controller, valve actuator, and temperature sensors. Popular systems like Hayward’s Goldline Solar Controller and Pentair’s Sun Touch allow you to set your desired temperature for the pool. These solar controllers use air temperature and water temperature sensors to measure the difference and control the valve actuator. When the air is hotter than the water, the system opens the valve and sends water to the solar panels to raise the water temperature. If the sun isn’t hot enough, the controller automatically closes the valve to prevent cooling the pool.
Additionally, these controllers often have freeze protection to circulate water when temperatures drop low enough to freeze the panels, protecting them from potential damage. Some controllers even let you automate the operation of your pool’s pumps, heaters, and lighting, turning them on or off as needed. They can also switch between solar panels and gas heaters or electric heat pumps to maximize energy consumption and save money on your utility bills.
Determining the Efficiency of Solar Swimming Pool Heating System
To measure the efficiency of a solar swimming pool heating system, you should consider the thermal performance rating of the collector. This is often measured in Btu (British thermal unit) or kWh (kilowatt hours) per square foot or square meter per day. The higher the Btu or kWh rating, the greater the solar energy collection efficiency. For example, Btu per day can be calculated by multiplying the rating in Btu/(ft2day) by the area in square feet, while kWh per day is determined by multiplying the kWh/(m2day) rating by the area in square meters.
Although weather conditions, instrumentation accuracies, and other test condition constraints may affect the ratings, if two collectors have ratings within 25 Btu/(ft2day) of each other, they can be considered approximately the same in performance. A high efficiency collector not only reduces your annual operating costs but may also require less collector area to effectively heat the pool.
System Maintenance
Maintaining your Sun-Ray solar pool heating systems is simple but essential for long-term performance. Regular attention is needed, as with any mechanical system, to ensure everything operates smoothly. Start by checking the panels and piping for any leaks at least twice per year. The controller and sensors should be tested for proper operation to keep everything in check. You can also rinse the panels periodically to remove dust or bird droppings that might accumulate. If needed, repairs can be made by soldering any damaged areas, and if the panels start to look worn, a fresh coat of paint will give them a new, repainted look.
Comparing Solar Swimming Pool Heating System Costs
Before investing in a solar pool heating system, it’s important to estimate and compare costs to find the most cost-effective solution. Start by looking at the solar collector models and checking their thermal performance rating in Btu/day. A more efficient collector might require fewer panels to cover the necessary collector area to heat the pool. You’ll need to calculate the total installed cost of the system and compare the energy output for every dollar spent. You can do this by using a simple formula: multiply the Btu/day by the number of collector panels or piping, then divide that by the total cost of the system. This gives you the Btu/day per dollar spent, helping you choose the most efficient option. Keep in mind that sizing, quality of design, and installation play a big role in the overall performance, so don’t base your decision solely on cost savings.
What is the Best Material for a Solar Pool Cover?
Using a sheet of plastic for your solar pool cover might seem like a quick fix, but it’s inconvenient and will likely only last 1 to 2 seasons. It’s far better to use a cover specifically designed for swimming pools. These covers are made from special materials such as UV-stabilized polyethylene, polypropylene, or vinyl, which are durable and long-lasting. These materials can be transparent to allow sunlight through, or opaque to prevent heat loss. Investing in a high-quality cover ensures better performance and a longer lifespan for your solar heating system.
What Thickness for Solar Pool Cover?
When choosing the right thickness for your solar pool cover, it’s important to consider the climate you’re in. In colder climates or windier climates, thicker pool covers between 14 mils and 16 mils provide better insulation, keeping the heat in. For warmer climates, a thin pool cover of 8 mils to 10 mils is often sufficient to maintain pool temperature without needing extra insulation.
Do Solar Pool Covers Sink?
When using solar pool covers, many people wonder whether they sink or stay afloat. The surface area of your solar collectors plays a key role here. According to Swim University’s Three Quarters Rule, you’ll need enough solar collectors to cover about three-quarters of the surface area of your pool. For example, with a 15 X 30 feet pool, that’s about 450 square feet, and your solar collectors should cover approximately 338 square feet. Since these covers are designed to float, they are made of materials that prevent them from sinking. So, no, solar pool covers will not sink, but they will cover the required surface area to maximize heat retention.
How Heavy is a 100W Solar Panel?
A typical 100W solar panel has varying item weight, but for example, a panel might weigh around 14.1 Pounds. The product dimensions for a panel of this size could be 41.8″L x 20.9″W x 1.4″H, giving you a sense of its overall size and how much space it will take up for installation. It’s important to know the weight when considering the installation or support needed for the panel, especially if you’re installing it on a roof or in a similar location.